Digital Humans
I used Zbrush to fix scans, sculpt heads from scratch or based on reference then create displacement maps. I used TextureXYZ + Mari then Substance Painter for textures. Maya for shader set-up, Xgen for any type of hair and Arnold raytracing for renders. I used Photoshop for correcting textures & final rendering touches.
CR1-0054_S (HeadHairGroom)
CR1-0054_Y (HeadHairGroom)

CR1-0056

CR1-0057_Y

CR1-0055_S

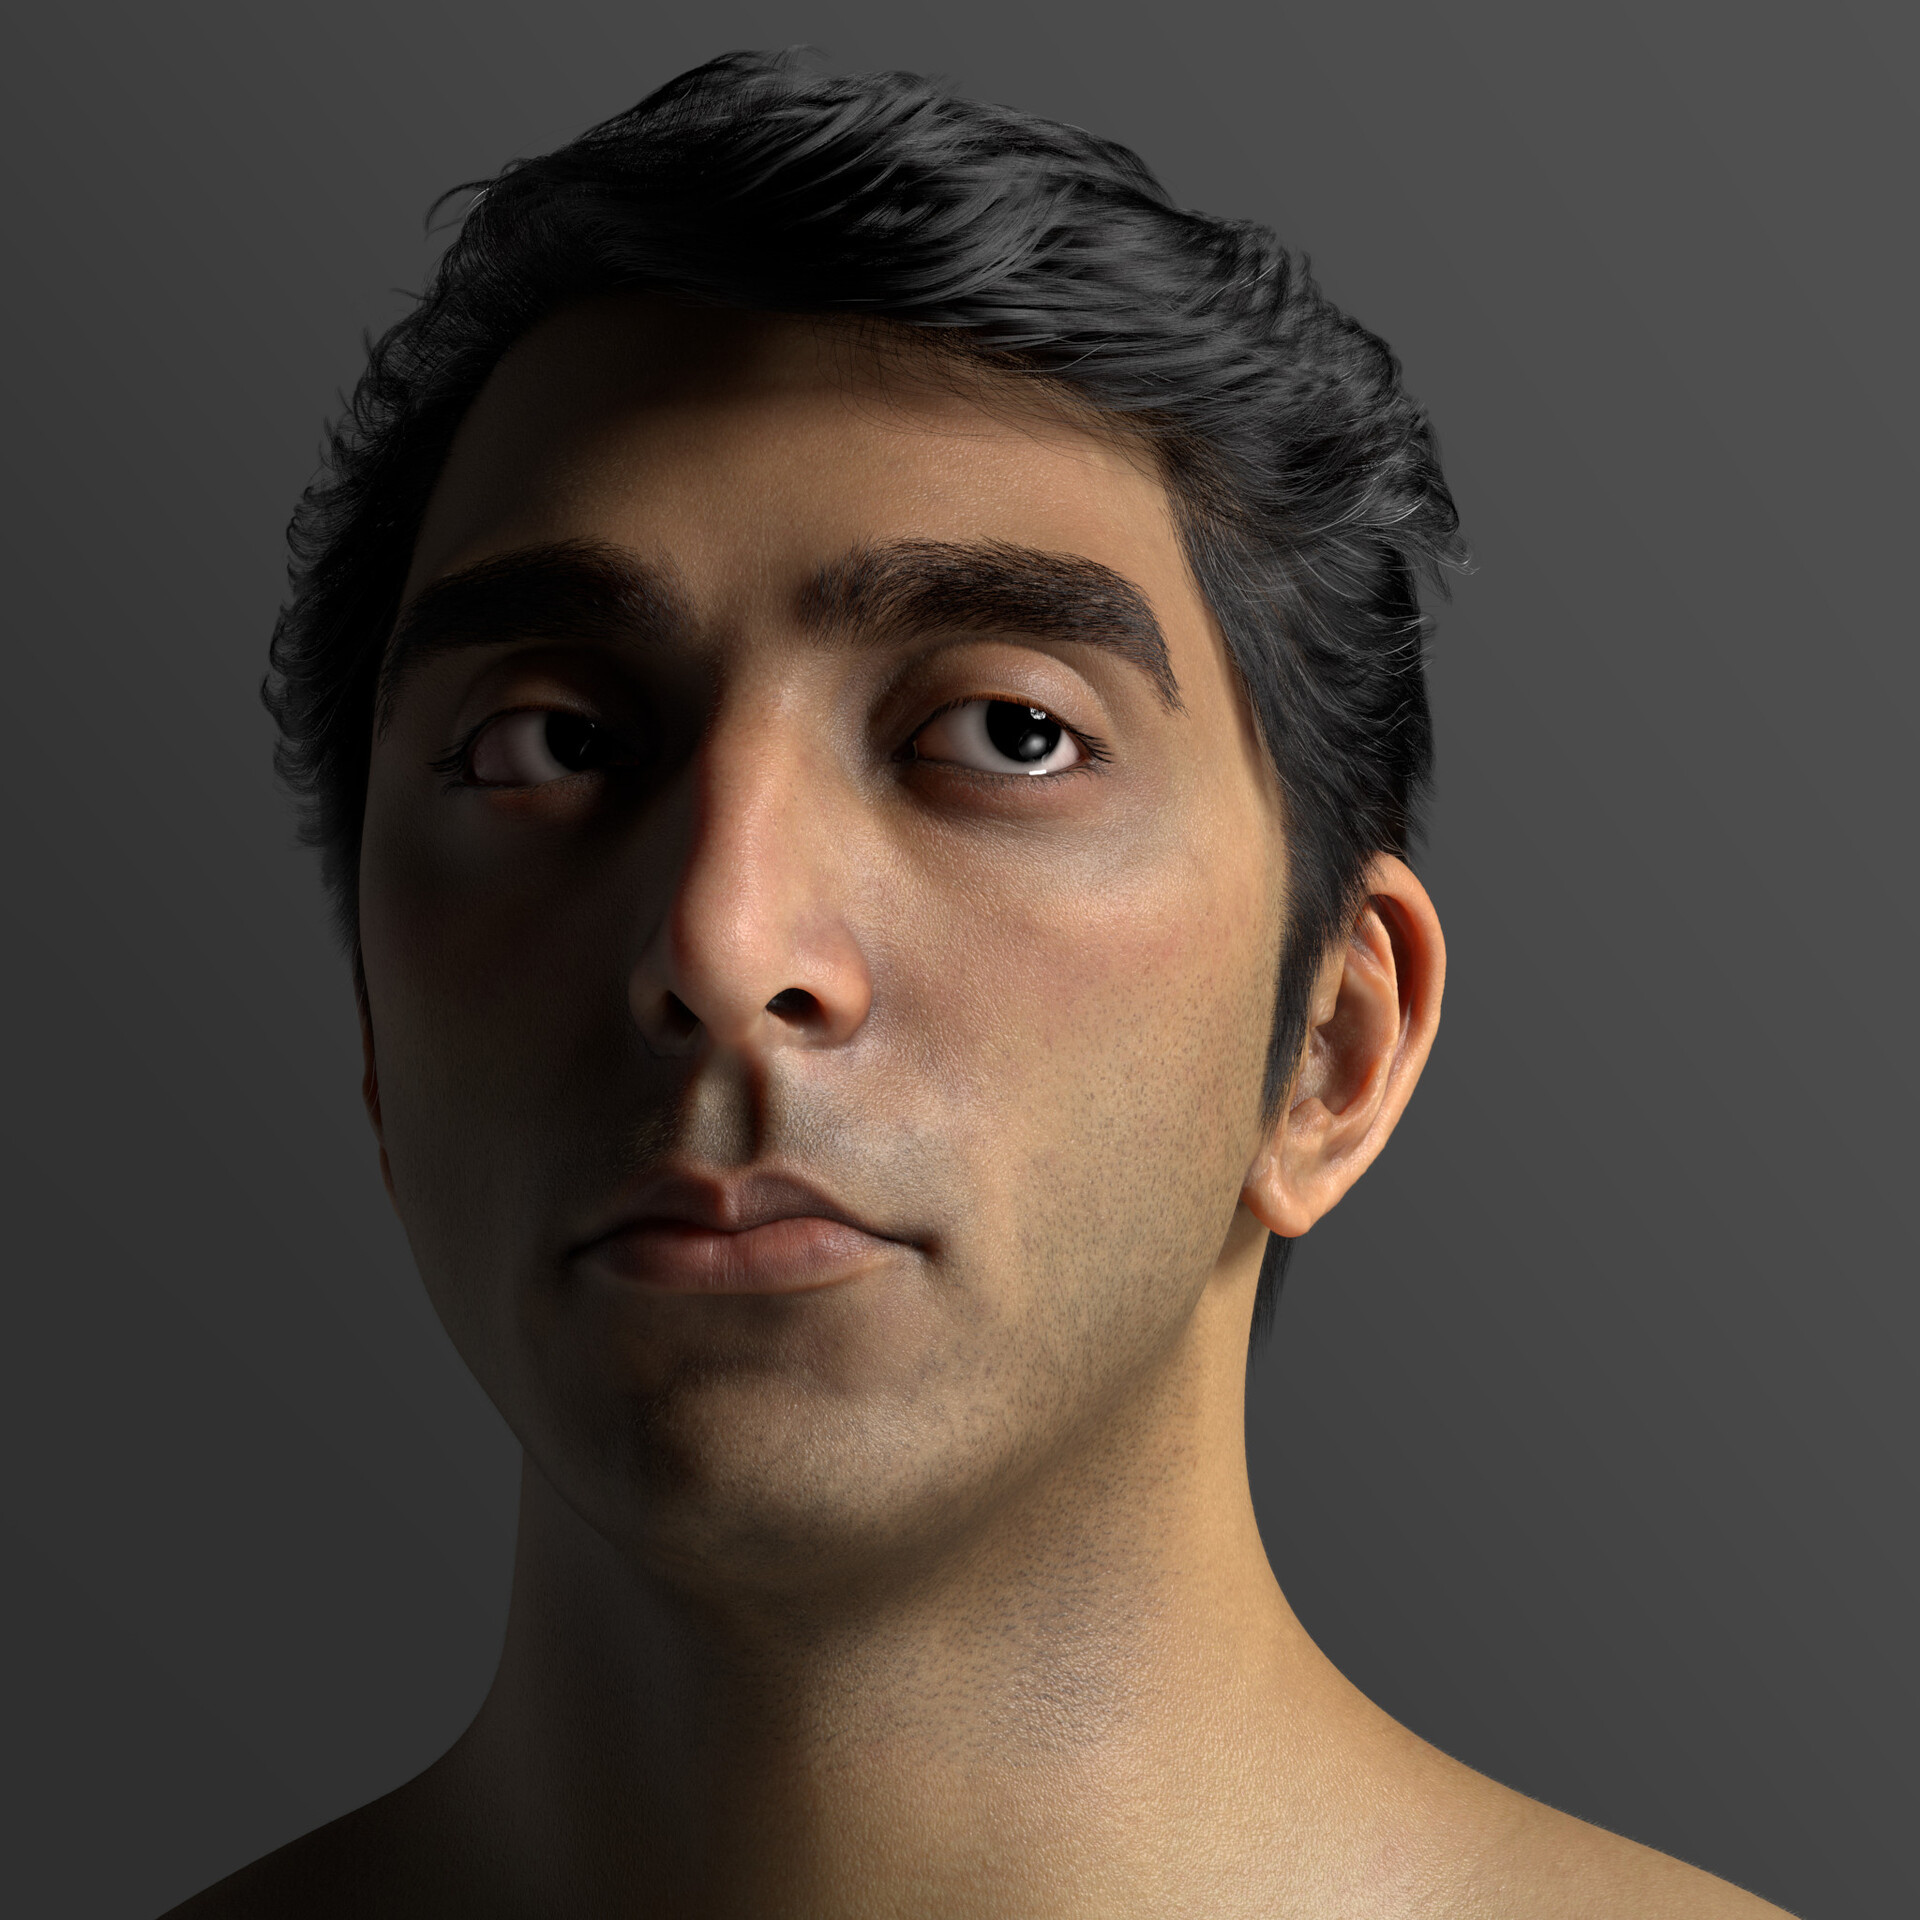
CR1-0054_Y & CR1-0057_Y

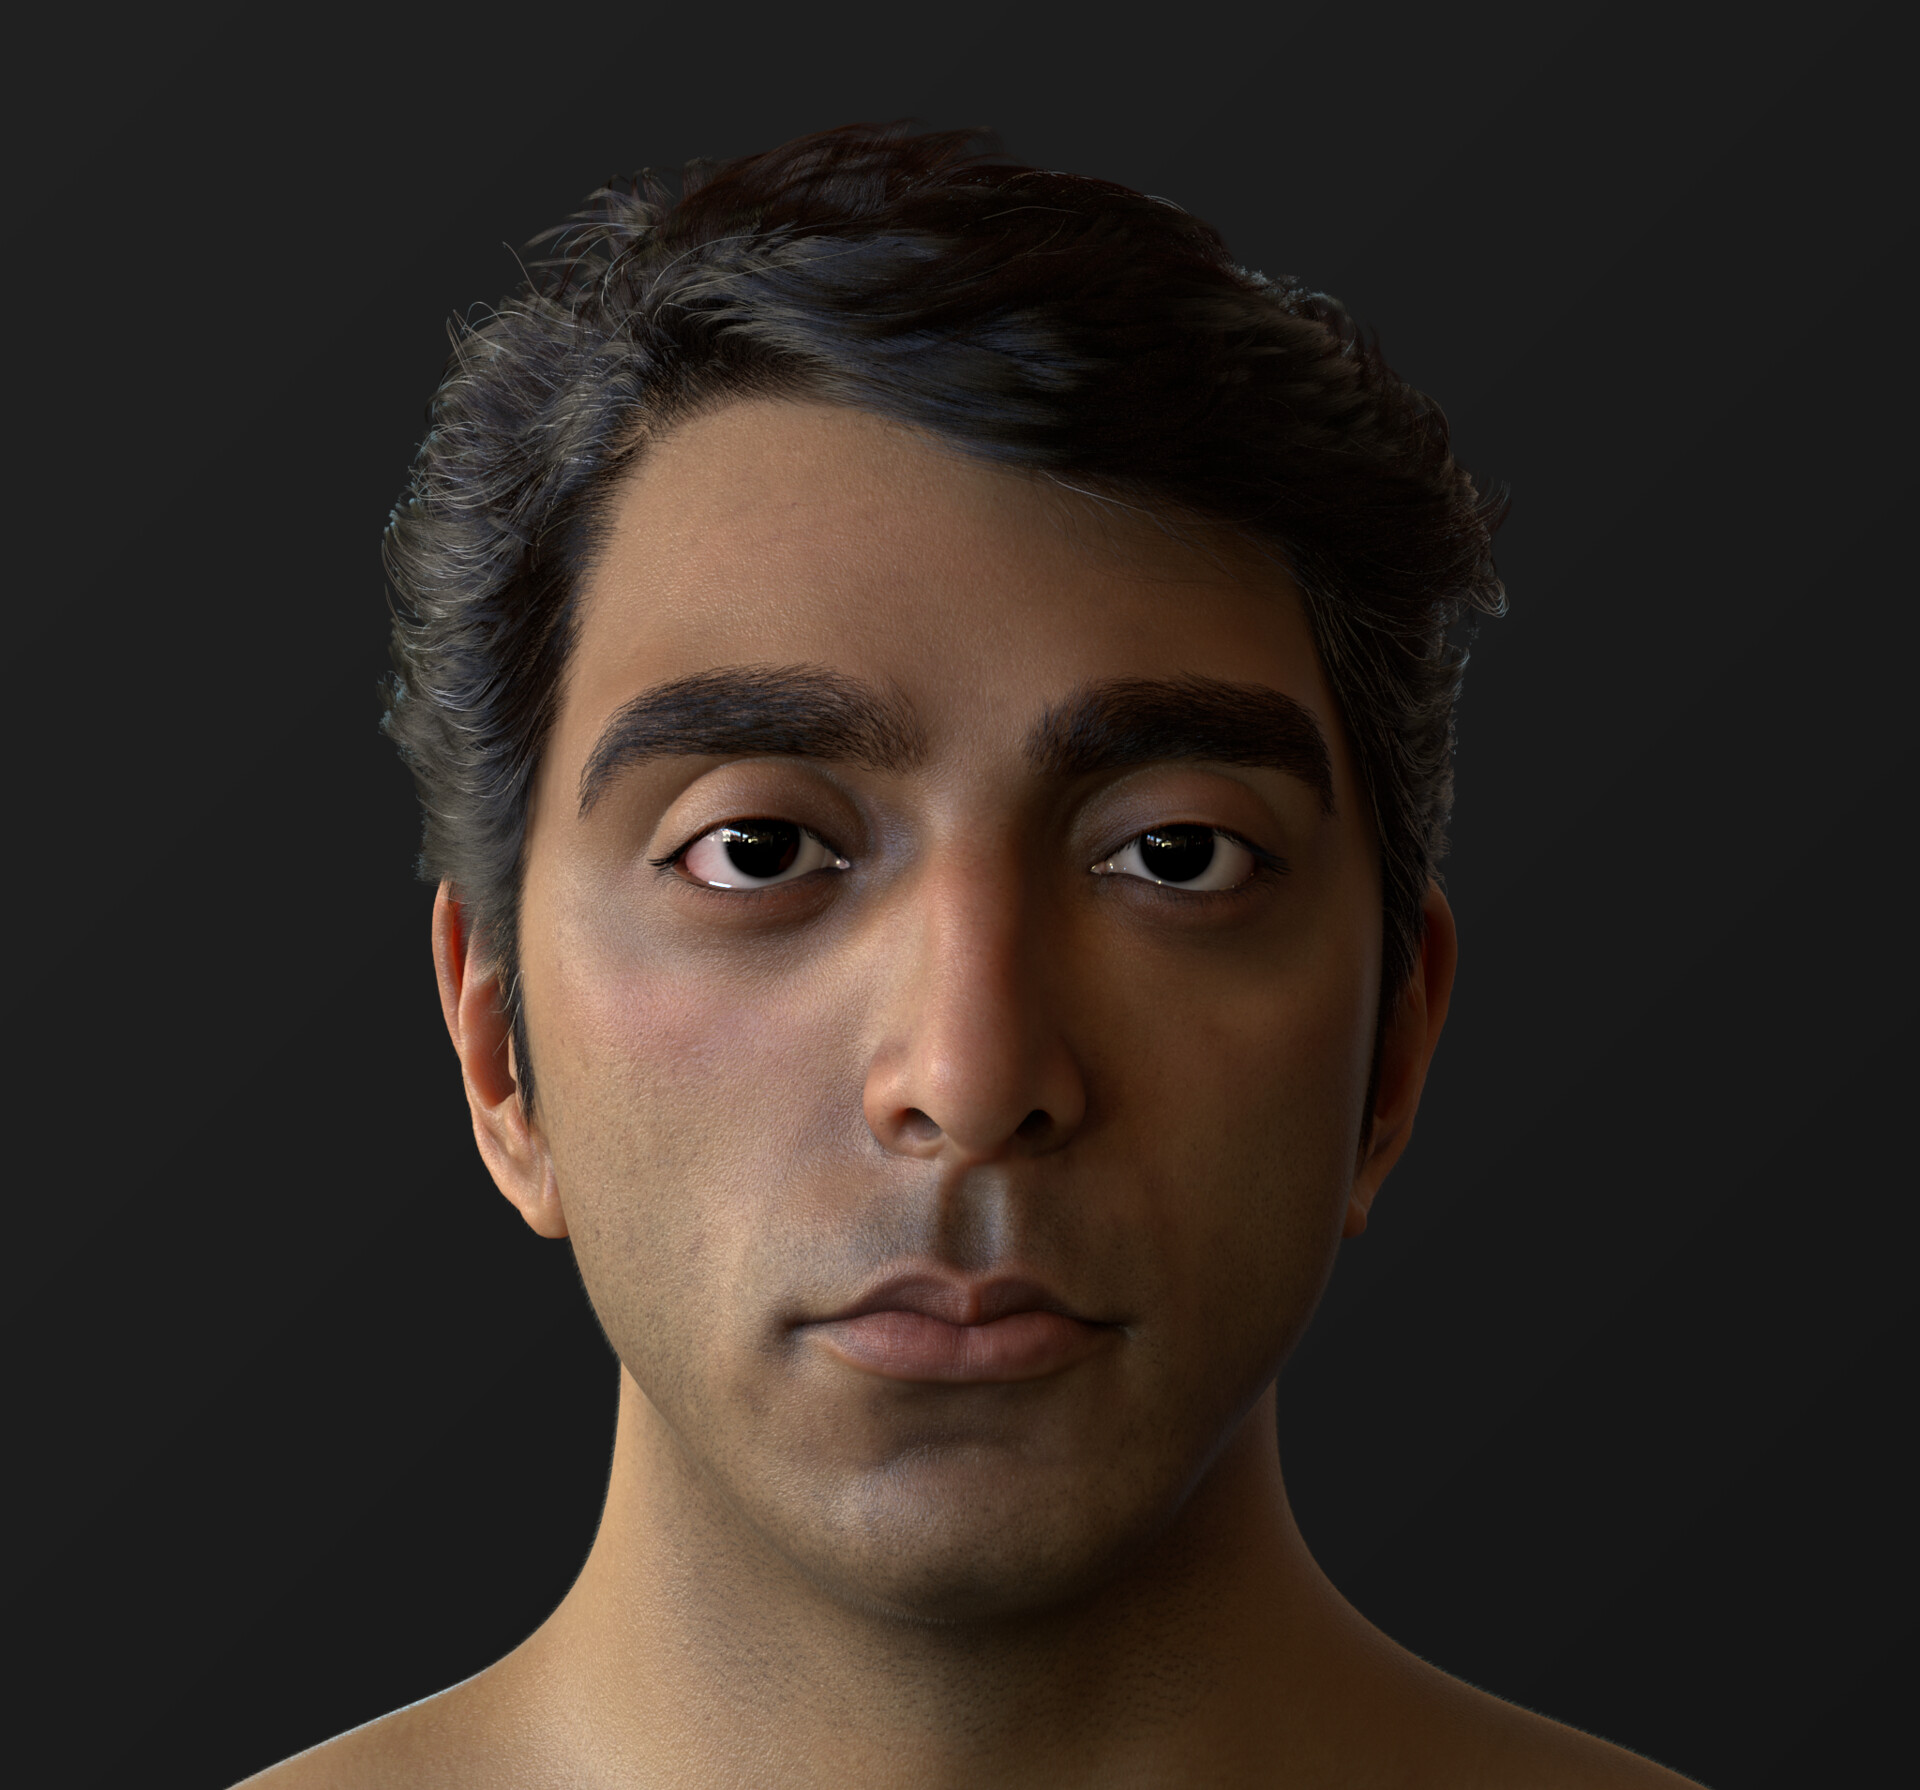
CR1-0056_Y & CR1-0055_S
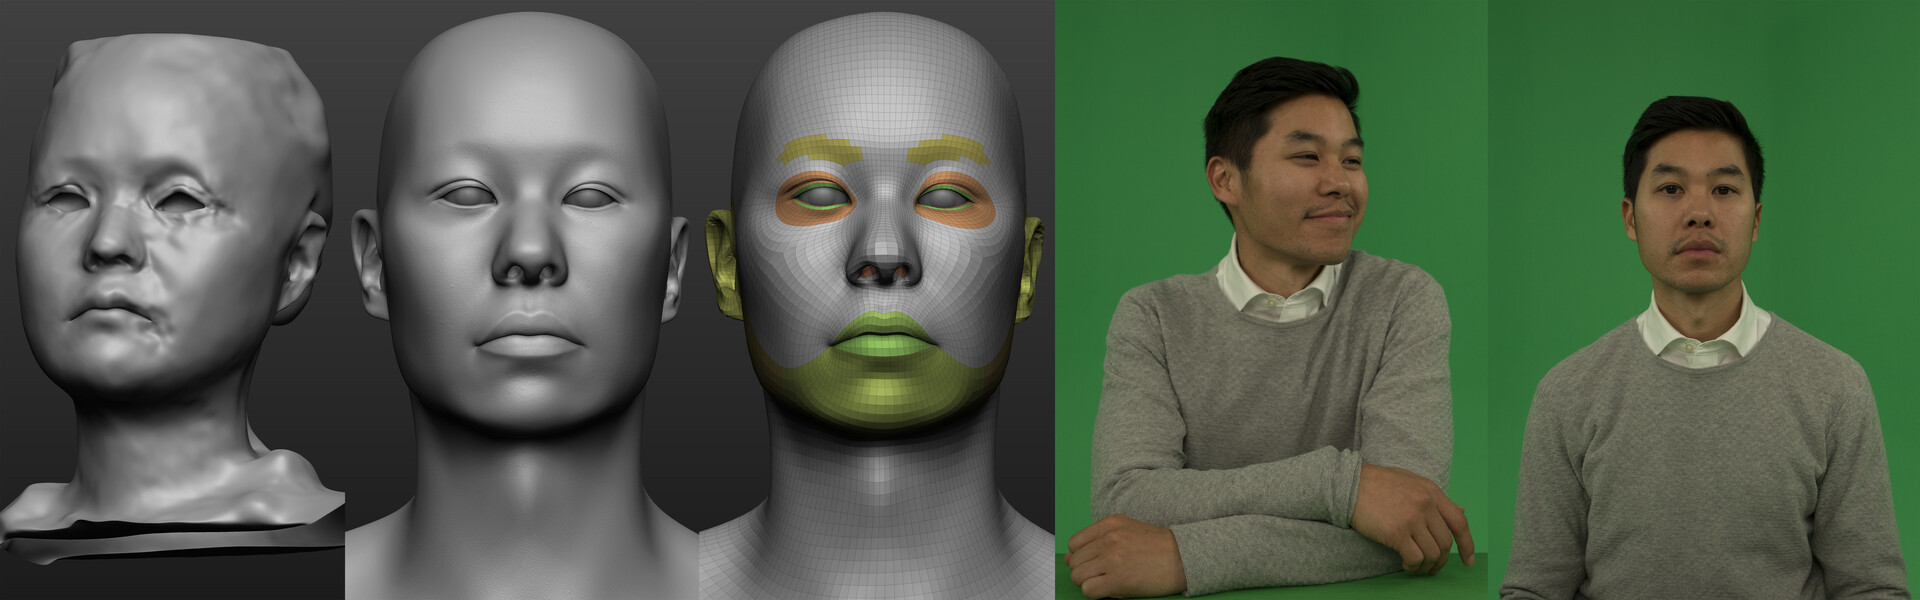
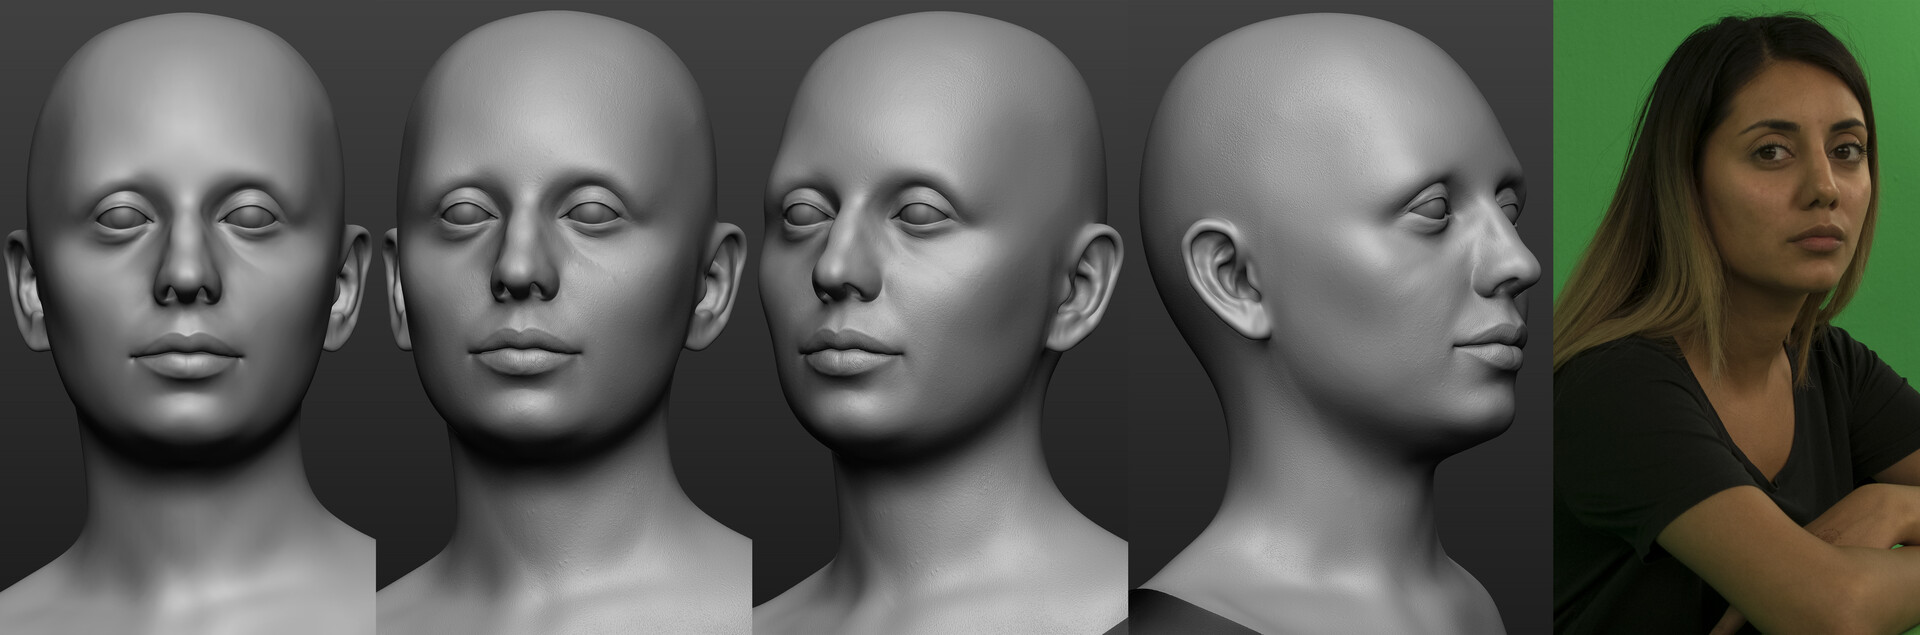
![CR1-0054 Scan, Reference, Zbrush Details. Topology, Groom [ Higher Quality Breakdown here: https://bit.ly/3aUp8CG ]](https://cdnb.artstation.com/p/assets/images/images/034/683/023/large/sorine-jil-yumeneoui-cr1-0054.jpg?1612935290)
CR1-0054 Scan, Reference, Zbrush Details. Topology, Groom [ Higher Quality Breakdown here: https://bit.ly/3aUp8CG ]
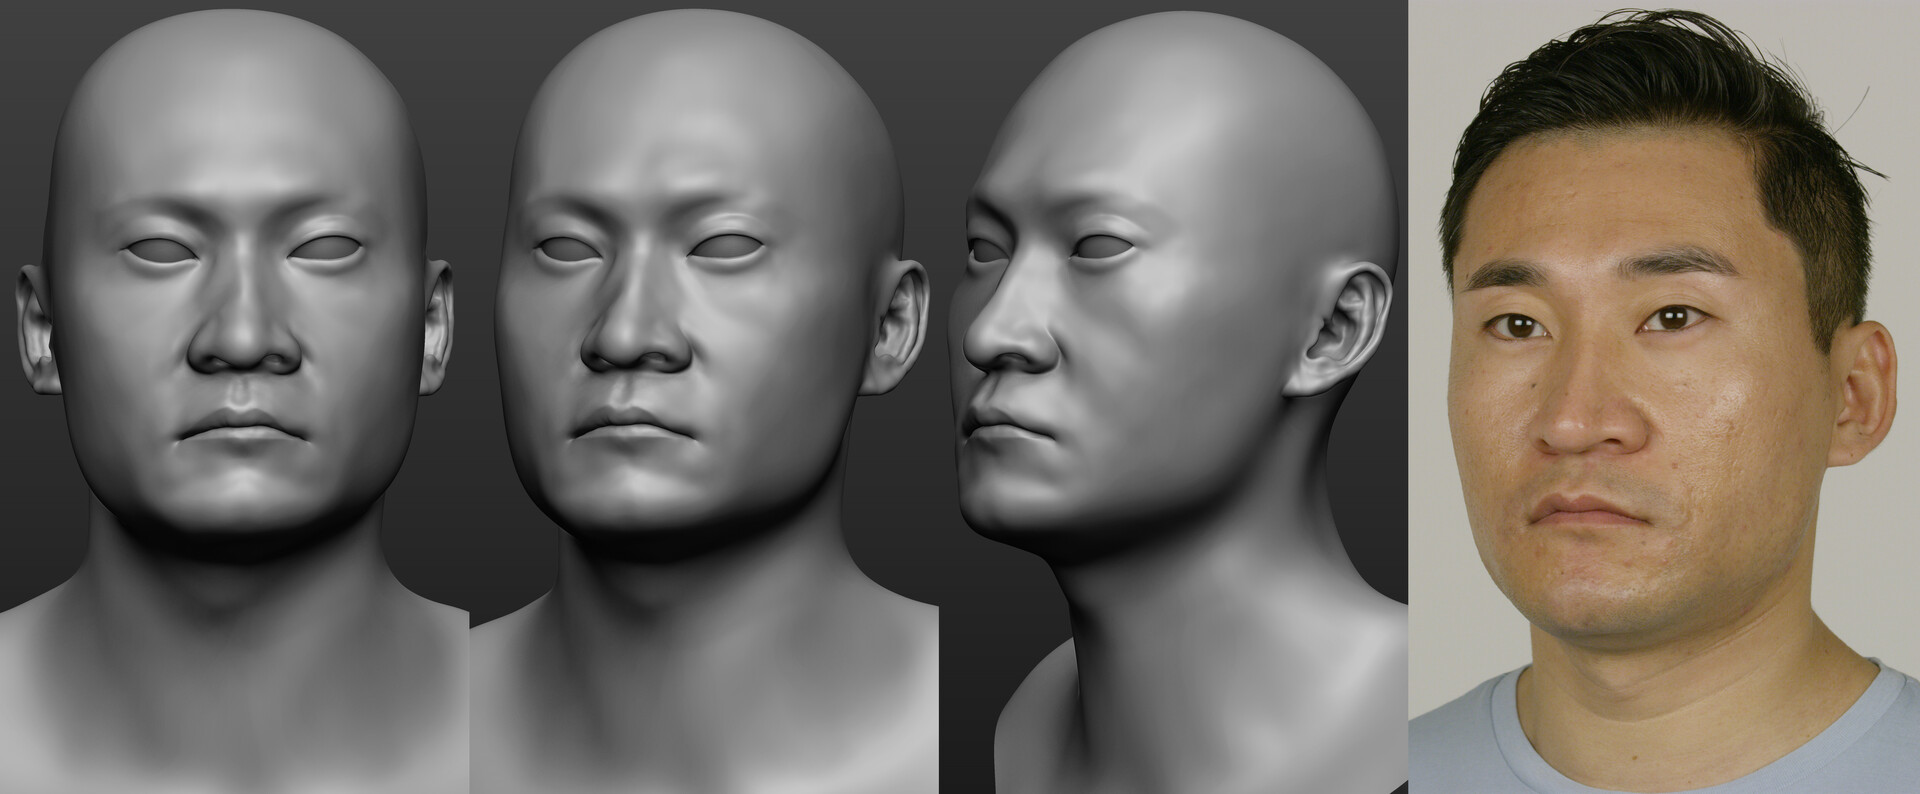
![CR1-0056 Topology, Zbrush Details & Reference [ Higher Quality Breakdown here: https://bit.ly/39Up6vA ]](https://cdnb.artstation.com/p/assets/images/images/034/544/571/large/sorine-jil-yumeneoui-zxczxczxc.jpg?1612559544)
CR1-0056 Topology, Zbrush Details & Reference [ Higher Quality Breakdown here: https://bit.ly/39Up6vA ]

CR1-0055 Zbrush Details & Reference
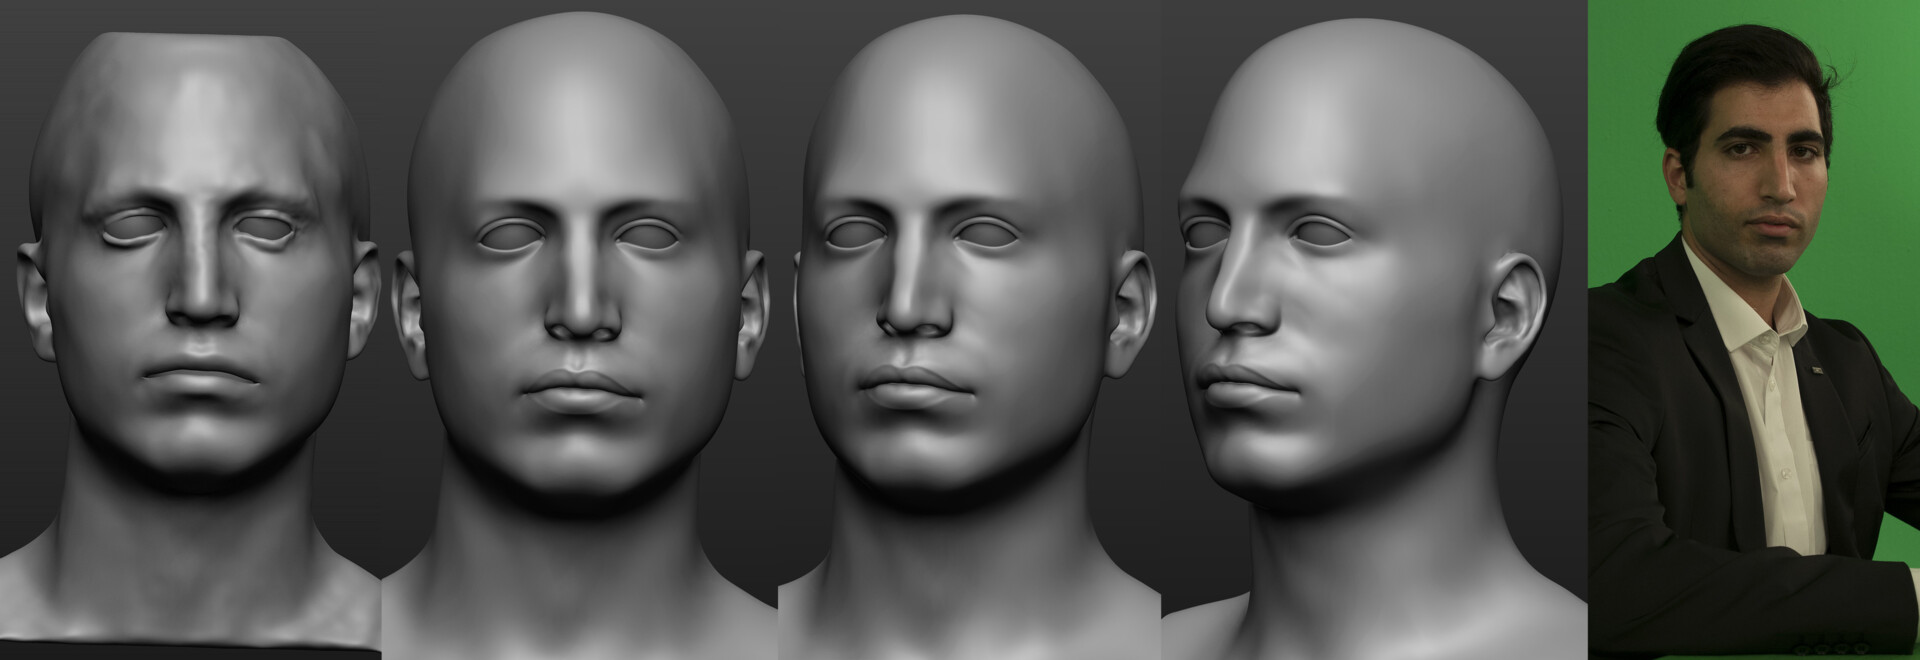
CR1-0057 Scan, Topology, Zbrush Details & Reference
CR1-0031 Zbrush Sculpt & Ref
CR1-0053 Zbrush Sculpt + Tertiary Details & Ref
CR1-0051 Scan, Zbrush Sculpt & Ref
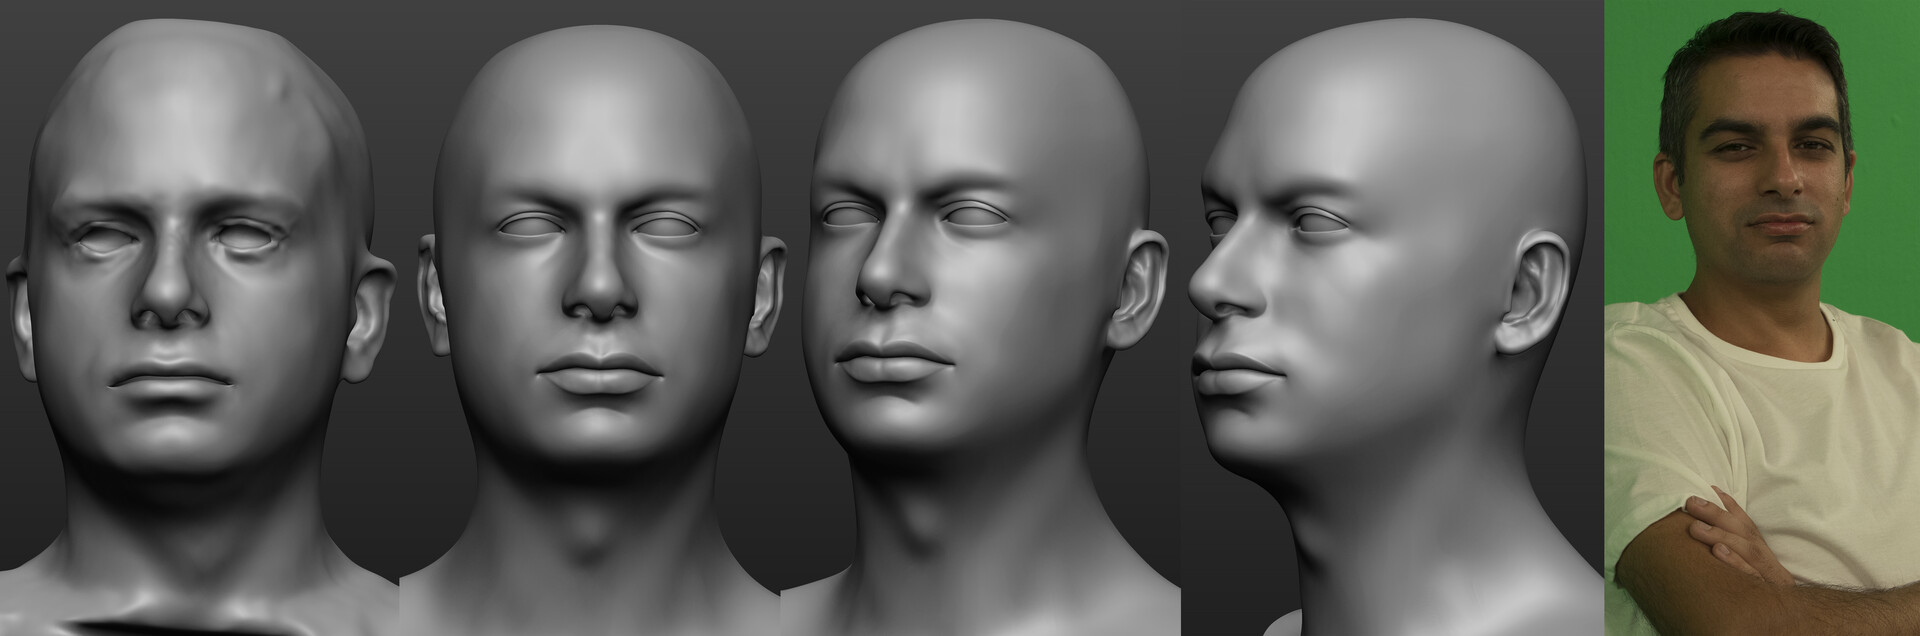
CR1-0052 Scan, Zbrush Sculpt & Ref